Tuesday, March 9, 2010

Pollo Saltado


One of my favorite meals from my time in Japan was not Japanese. It's from a Peruvian restaurant in Isesaki (the city where I lived) called La Bodeguita. La Bodeguita is a hole in the wall place (or, rather, it used to be when I lived in Japan; friends told me it's now at a new, much larger location), very few tables, but the best food for miles. Fellow JET programme participants from other cities would come to Isesaki specifically for La Bodeguita, even though they felt our city did not have much else to offer. That's how good the food was.


Anyway, my favorite meal in Japan was pollo saltado. It's made with chicken, onions, tomatoes, french fries, and various ingredients for the marinade. It's usually served with rice. At La Bod, they had an AMAZING sauce that went with basially every menu item they served. We all loved it. A few people, right before leaving the country, asked for the recipe; they never got it.

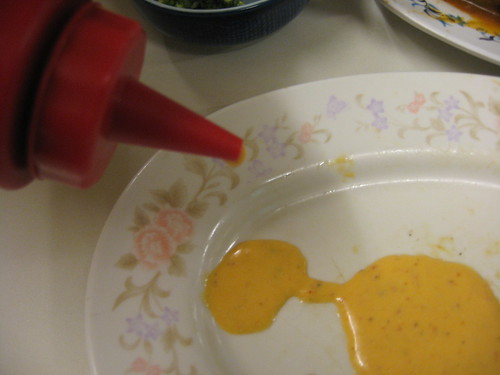
In November 2008, I made a valient attempt at making pollo saltado. Something was a bit off taste-wise, but it was nearly picture perfect. I even tried to make the special sauce, and while the taste was divine, it was not spicy enough, and the color was wrong, wrong, wrong. I used yellow chiles, so the next time I try to make it, I will use some sort of red or orange chili. Silly me did not record the ingredients, though. :(

Yesterday, I not only attempted the meal, which is one of my favorites, but I believe that I successfully recreated it. Unfortunately, I did not measure any of the ingredients. I did, however, take note of what I put in and approximately how much I put in.

My Pollo Saltado (serves 2)

1 chicken breast
reduced sodium soy sauce
cumin
oregano
cilantro
1/2 medium onion
8-10 cherry tomatoes
oil
french fries (about 1 handful)

Cook french fries according to directions on bag.

Place chicken breast in a zip lock bag. Pour approx. 1/6 cup soy sauce, about 1/4 teaspoon cumin, about 2 teaspoons oregano, and 1-2 teaspoons cilantro. Close bag and shake. Refrigerate while slicing onions.

Slice onion. Add to zip lock bag. Refrigerate until fries are nearly finished.

Heat skillet. Add oil. Chop chicken into long(ish) slices. Add to skillet. Flip, then add onions and rest of marinade.

When chicken and onions are fully cooked, add french fries. They will absorb liquid and turn brown. Add cherry tomatoes and cook about 1 minute longer.

Serve and enjoy!

(Normally, pollo saltado is served with a side of plain rice and the sauce mentioned above, but I went without either of those this time.)

Saturday, March 6, 2010

Marshmallow Cookies

Yet another Daring Baker's Challenge. Marshmallow Cookies! This one was from last July. The thought of homemade marshmallows was a bit daunting, but they were much easier (and tastier) than I'd expected.

It all started with the cookie dough, which was a basic cookie recipe. I doubled the amount of cinnamon, as I do in most recipes that calls for it. After chilling it for a couple of hours, I rolled it out and used a round cookie cutter before sliding them into the oven.


While the dough had been chilling, I made the marshmallow goo:


After the cookies had baked, I let them cool awhile and then piped the marshmallows on top of each one. I tried, sometimes unsuccessfully, to pipe them in the shape of a Hershey's Kiss.

I let them cool overnight. First thing in the morning, I made the chocolate sauce and then dipped each marshmallow-topped cookie in the small river of chocolate. They were quite cute.


I don't usually like marshmallows, but I liked this homemade version. The cookie itself was tasty. A friend of mine said the entire cookie was like eating a s'more. Unfortunately, if you remember from prior posts, my digital camera's screen is broken, so I cannot view the photos immediately after taking them. The final, inner cookie photo did not work, but I'll still post what little of it that I did happen to get.

Wednesday, February 24, 2010

It's good to be able to laugh at yourself, even when those laughs stem from a ridiculous looking baking attempt. This creation was one of the Daring Bakers' Challenges.

The August 2009 Daring Bakers' challenge was hosted by Angela of A Spoonful of Sugar and Lorraine of Not Quite Nigella. They chose the spectacular Dobos Torte based on a recipe from Rick Rodgers' cookbook Kaffeehaus: Exquisite Desserts from the Classic Caffés of Vienna, Budapest, and Prague.

Since the torte looked quite rich, I decided to half the recipe. I started with the cake layers:

1 large eggs, separated, at room temperature
2/3 cups confectioner's sugar, divided
1/2 teaspoon vanilla extract
1/2 cup plus 1 tablespoons sifted cake flour
pinch of salt

Although the directions state to bake the cake on round forms, I decided to bake mine on two jelly roll sheets, which resulted in very thin cake layers. Below are the directions and my changes.

Directions for the sponge layers:

1.Position the racks in the top and centre thirds of the oven and heat to 400F.
2.Oil baking sheets and fit parchment paper on each.
3.Beat the egg yolks, 1/3 cup of the confectioner's sugar, and the vanilla in a medium bowl with a mixer on high speed until the mixture is thick, pale yellow and forms a thick ribbon when the beaters are lifted a few inches above the batter, about 3 minutes.
4.In another bowl, using clean beaters, beat the egg whites until soft peaks form. Gradually beat in the remaining 1/3 cup of confectioner's sugar until the whites form stiff, shiny peaks. Using a large rubber spatula, stir about 1/4 of the beaten whites into the egg yolk mixture, then fold in the remainder, leaving a few wisps of white visible. Combine the flour and salt. Sift half the flour over the eggs, and fold in; repeat with the remaining flour.
5.Using a small offset spatula, divide the batter in half and spread onto prepared baking sheets. Use the spatula to even out the batter as evenly as possible. Bake on the top rack for 4-5 minutes, until the cake springs back when pressed gently in the centre and the edges are lightly browned. Cool layers completely.

After the layers are cooled, cut them into small rounds. I used the top of a class to shape the rounds, making about two dozen of them.

Then, it was time to prepare the buttercream.

Chocolate Buttercream

2 large eggs, at room temperature
1/2 cup sugar, ground in food processor until very fine
2oz bakers chocolate, finely chopped
1 sticks plus 1 tablespoons unsalted butter, at room temperature.

Directions for the chocolate buttercream:

NB. This can be prepared in advance and kept chilled until required.

1.Prepare a double-boiler: quarter-fill a large saucepan with water and bring it to a boil.
2.Meanwhile, whisk the eggs with the sugar until pale and thickened, about five minutes.
3.Fit bowl over the boiling water in the saucepan (water should not touch bowl) and lower the heat to a brisk simmer. Cook the egg mixture, whisking constantly, for 2-3 minutes until you see it starting to thicken a bit. Whisk in the finely chopped chocolate and cook, stirring, for a further 2-3 minutes.
4.Scrape the chocolate mixture into a medium bowl and leave to cool to room temperature. It should be quite thick and sticky in consistency.
5.When cool, beat in the soft butter. Chill while you make the caramel topping.

(As you'll see in the photos below, I failed to chill the buttercream long enough. It was too runny, which resulted in very funny looking mini tortes. :) )

Finally, the dreaded caramel topping. Many of the posts I read reported problems with this step, so I was a bit nervous. Not, however, nervous enough.

Caramel topping recipe

1/2 cup sugar, ground in food processor until very fine
6 tablespoons water
4 teaspoons lemon juice

The caramel topping seemed like it would be easy enough. I cut two of the cake rounds into eight triangular pieces each. I boiled the ingredients together, occasionally swirling the pot. When the liquid started to change colors, though, I got preoccupied with something, and next thing you know, it was dark brown. It was only supposed to become amber in color, so I knew it was probably a bit burnt but decided it would be okay. I poured the liquid over the cut cake pieces. It hardened right away, and again, I made a mistake in not completely following the directions, which state to cut the pieces apart in less than a minute. Instead, I let the pieces stand for quite a few number of minutes, and when I returned to them, the caramel had set. I had to attempt to chip apart each triangle, only successfully doing so for about eight of them.

Anyway, to assemble the cakes, I started with a cake layer and then topped each layer with the buttercream. I continued, making about ten layers each. They were looking cute at this point.

However, as I stated above, I hadn't let the buttercream cool enough, so when it came to frosting the entire cakes, the buttercream was very gloopy. It was actually quite amusing. My friend and I had a laugh over it. We topped the cakes with the caramel triangles. The final result doesn't look very pretty, but it was tasty. The caramel triangles were definitely not a success. The caramel tasted burnt, and I picked mine off and threw them away, but the cake was good. :)

Monday, February 22, 2010

December Cookie Exchange

Back in December, right before the holidays, I had a cookie exchange. It was, fortunately, a success. I had nine girls over, and one wanted to participate but had to work, so she gave me her cookies earlier in the day and we collected a plate for her. This means that there were a total of 11 of us who each baked between three and eight dozen cookies. (Yes, one girl made about eight dozen, because she doubled a recipe that was already very large in and of itself.)

There was a great variety of cookies, including dark chocolate pistachio biscotti, oatmeal butterscotchies, sugar cookies, easy-as-cake chocolate cookies, world peace cookies, chocolate dipped peanut butter balls, split second cookies, and many more. They all look delicious, and the ones that I've tasted, the looks have not been deceiving. :)

I ended up making Martha Stewart's sour cherry dark chocolate cookies. They didn't quite puff up as I'd have liked them to, but that's okay. (Actually, I just looked at Martha Stewart's cookies, and they're only puffy in the middle. Most of mine did that, too, so maybe that's how they're supposed to be. Yay!) The recipe can be found on Martha Stewart's website. The only thing I changed was that I used semi-sweet chocolate chips instead of the bittersweet chopped chocolate, as that's what I had on hand, and I only used 7 ounces of dried cherries, as that's the only size I found at the store (Whole Foods, the only place I could find them) and I did not want to buy two containers.

For appetizers, I made nachos (with cheese, spicy chicken, beans, and the option of topping them with sour cream, black olives, and salsa), bread with a cheesy bacon and onion dip, and some rather strange wraps.

I liked that everyone mingled, which doesn't often happen when I mix different groups of friends. I had fun, and it seemed like others did, too.

Here is a photo of all the cookies I collected from everyone, minus two that I've eaten. :D While the photo does not make it seem like a lot of cookies, there are between four and five dozen there. Wow!

Friday, February 12, 2010

Macarons

The 2009 October Daring Bakers’ challenge was brought to us by Ami S. She chose macarons from Claudia Fleming’s The Last Course: The Desserts of Gramercy Tavern as the challenge recipe.

Since I don't know very much about macarons, I wasn't initially as wary of making the as other DB participants. When I read the recipe, it seemed easy enough. The most trying thing that I saw was purchasing almond flour, which is quite pricey. Ah, well, it does make lovely treats.

While making the macarons, I was also making oatmeal ice cream at the same time. I think this may have been my saving grace, because I whipped the egg whites until quite stiff. After folding in the flour and sugar, I started to worry because the whole process just seem way too easy despite the other participants' concerns. But I baked on. I forgot to time the first batch, so I went by color. As you will see below, this was a mistake. Although they were slightly changed in color, they weren't baked long enough, as I discovered when I compared them to the ones I baked a proper amount of time.

Below are the photos and recipe.

First, the failed batch. As you can see, they're very flat. They're also slightly undercooked. Still tasty, though. :)

The next batch, though, were snug in the oven for long enough and turned out much better.


After cooling, I spread chocolate ganache between two pieces, pressed them together, and tra la!-- macarons!

Saturday, February 6, 2010

I love soup. I could eat it every day. And that's what I did for a good portion of one month. I made the usual pumpkin soup (link follows), and a curried carrot and apple soup, among others.

Curried Carrot & Apple Soup

Serves: 8
Preparation time: 1 hour

Ingredients
1 tablespoon extra-virgin olive oil
1 large onion, chopped (2 cups)
1 stalk celery, finely chopped
1 tablespoon curry powder
5 large carrots, peeled and thinly sliced (3 cups)
2 large McIntosh or other apples, peeled and coarsely chopped (3 cups), peeled and coarsely chopped (3 cups)
1 bay leaf
4-1/2 cups reduced-sodium chicken broth
1/4 teaspoon salt
Freshly ground pepper to taste
2 tablespoons low-fat plain yogurt for garnish (optional)
1 tablespoon chopped fresh parsley, dill or basil for garnish (optional)

(MY NOTES: quarter the oil, 2 stalk celery, a bit more curry powder, 2 bay leaves, no salt, no yogurt)

Preparation
1. Heat oil in a large saucepan or medium soup pot over medium heat. Stir in onion and celery; cook until the onion is softened and translucent, 8-12 minutes; do not brown.

2. Stir in curry powder, then add carrots, apples and bay leaf. Stir well over medium heat for 2 minutes, then add broth and salt. Bring the mixture to a low boil, then reduce the heat to low. Cover tightly and simmer until the carrots and apples are tender, 20-25 minutes.

3. Remove the bay leaf. Using a large slotted spoon, transfer the soup solids to a food processor, adding about 1/2 cup of the broth; process to a smooth purée. Pour the purée back into the soup. Reheat and season with pepper. Serve piping hot, garnishing each serving, if you like, with a dab of yogurt and a sprinkle of fresh herbs.

(MY NOTES: No need to transfer to food processor; use immersion blender instead.)

I also made a beef stew and a peanut butter vegetable chicken soup. The latter may sound odd, but it has quickly climbed the ladder of my all-time favorite soups. And as I said, I love soup, so this is quite an achievement for said soup! For the curious, here is the recipe, which includes all my changes:

Ingredients
8 cups chicken broth
2 cups diced, cooked chicken meat
1 cup peeled and cubed potatoes
1 cup diced carrots
1 cup diced zucchini
1 cup spinach
1 cup tomato sauce
1/2 cup chopped celery
1/2 cup chopped onion
1/2 cup chopped red and yellow bell pepper
2 cloves garlic, minced
1/2 cup peanut butter
1 1/2 teaspoon dried parsley
salt to taste
ground black pepper to taste

Directions
1.In a large stock pot, combine the broth, chicken, potatoes, and carrots. Bring the soup to a boil, and then reduce heat to medium. Cook for about 10 minutes, till vegetables are tender.
2.Add zucchini, broccoli, tomatoes, celery, onion, green pepper, and garlic. Simmer for about 8 minutes.
3.Add peanut butter, parsley, salt, and pepper; stir until peanut butter is fully blended. Simmer for 3 minutes longer. .


The only soup that I actually took a photo of was the beef stew. As I've stated before, I only started eating beef this last year, so making anything with beef is new to me. This was my first stew. I also made biscuits to go with them.

To give credit where credit is due, I found the original recipes for all the soups at the following websites:


Cream of Pumpkin Soup

(This is the only one I don't ever change, except for switching half & half for the cream; it's perfect as is.)
Slow Cooker Beef Stew

(I didn't make any changes to this, as it was, as I stated, my very first time making stew.)
Peanut Butter Vegetable Chicken Soup
(changes seen above)
Curry Carrot and Apple Soup

Sunday, November 11, 2007